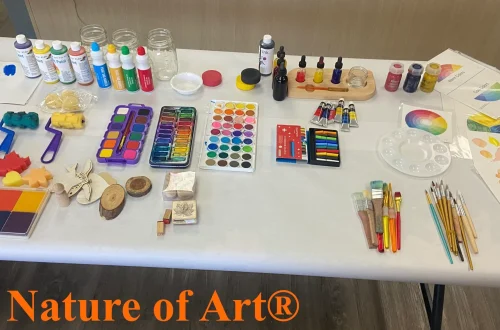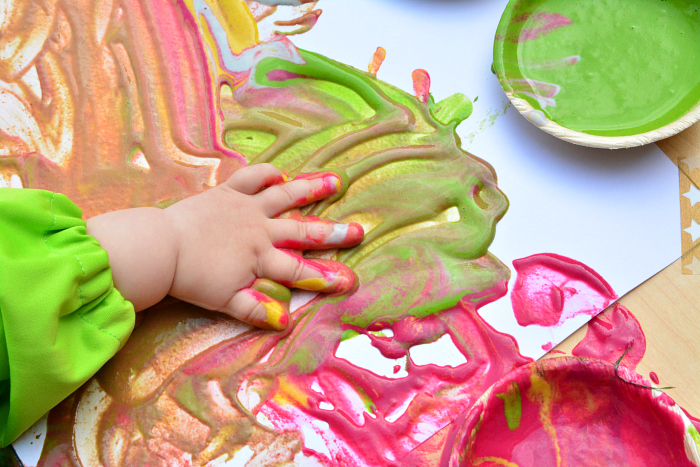
Finger painting is one of the most fundamental and joyous forms of artistic expression for young children. It engages multiple senses, encourages creativity, and helps develop fine motor skills. However, many parents and educators worry about the safety of commercial finger paints, which may contain synthetic chemicals, preservatives, or dyes that aren’t ideal for little ones who are still likely to taste anything they touch.
Fortunately, creating safe, non-toxic finger paint at home is remarkably simple and requires only basic kitchen ingredients. Homemade finger paint not only eliminates concerns about harmful substances but also offers the flexibility to customize colors, textures, and even scents to suit your child’s preferences. Best of all, it costs a fraction of commercial alternatives while providing the same messy, creative fun that children love.
The Importance of Safe Art Supplies for Children
Young children learn about their world primarily through sensory exploration, which often involves putting objects (including art supplies) in their mouths. This natural behavior makes safety a paramount concern when selecting materials for artistic activities:
Developmental Considerations
Children under the age of three are in a critical period of sensory development:
- They learn through touch, taste, and exploration
- Hand-to-mouth behavior is normal and expected
- Fine motor skills are still developing, making controlled brushwork challenging
- Creativity flourishes when children can explore materials freely
Potential Risks in Commercial Products
Even products labeled as “non-toxic” may contain ingredients that are not ideal for young children:
- Synthetic preservatives that may cause skin irritation
- Artificial fragrances that can trigger allergies
- Heavy metal pigments in some colored paints
- Chemical binders that may not be food-safe
The 4-Ingredient Recipe
Creating safe, effective finger paint requires only four simple ingredients that you likely already have in your pantry. This recipe produces smooth, vibrant paint that’s perfect for little hands and developing artistic skills:
Basic Homemade Finger Paint
- 1/2 cup all-purpose flour
- 1/4 cup salt
- 3/4 cup water
- Food coloring or natural colorants (see options below)
- Mix Dry Ingredients: In a medium saucepan, whisk together the flour and salt until well combined. This step ensures there are no lumps in your final paint.
- Add Water Gradually: Slowly pour the water into the dry ingredients while continuously whisking. This prevents lumps from forming and ensures even mixing.
- Cook the Mixture: Place the saucepan over medium-low heat. Cook the mixture, stirring constantly, for 3-5 minutes until it thickens to a pudding-like consistency. The paint is ready when it coats the back of a spoon.
- Cool Completely: Remove from heat and allow the mixture to cool to room temperature. This is crucial for both safety and proper texture.
- Add Color: Divide the cooled base into separate containers and add food coloring to achieve your desired colors. Start with a few drops and add more gradually until you reach the intensity you want.
- Final Mixing: Stir each colored portion thoroughly to ensure even color distribution.
Natural Color Options
While food coloring provides vibrant, consistent colors, natural alternatives offer additional benefits and can be a fun educational experience:
Natural Colorants
- Red/Pink: Beet juice, cooked beet puree, or pomegranate juice
- Orange: Carrot juice, paprika mixed with a little water, or turmeric
- Yellow: Turmeric, saffron steeped in warm water, or corn kernels blended with water
- Green: Spinach juice, matcha powder, or blended parsley
- Blue/Purple: Red cabbage juice (turns blue in basic solutions, purple in neutral), blueberry juice, or blackberry juice
- Brown: Brewed coffee (cooled), cocoa powder, or melted chocolate
Tips for Using Natural Colorants
- Natural colors may be more muted than artificial food coloring, but they offer a beautiful, earthy palette
- Strain liquid colorants through a fine mesh to remove pulp and ensure smooth paint
- Some natural colorants (like turmeric) may stain clothing more than artificial dyes
- Store natural colorants separately as they may have different shelf lives
Instructions for Preparation and Use
Proper preparation and setup can make the difference between a fun art session and a frustrating mess:
- Protect the Workspace: Cover tables and floors with plastic sheeting, old sheets, or newspapers. An oilcloth tablecloth works wonderfully and is easy to clean.
- Prepare Clothing: Dress children in old clothes or large aprons. Consider having them work barefoot or in socks to prevent tracking paint.
- Gather Supplies: Have large sheets of paper (butcher paper works well), wet wipes for cleanup, and damp towels for hand washing readily available.
- Portion Paints: Pour individual colors into small, shallow containers like yogurt cups or small bowls. This prevents cross-contamination and makes it easier for small hands to access.
- Encourage Exploration: Let children experiment with mixing colors, making handprints, or using different parts of their hands for different effects.
- Demonstrate Techniques: Show how to dab, swipe, or press fingers into the paint, but let them discover their own methods.
- Provide Guidance: Offer suggestions for what to create, but avoid directing their artistic choices too heavily.
- Stay Engaged: Participate in the activity to make it more enjoyable and to help prevent accidents.
Storage Tips for Reuse
With proper storage, homemade finger paint can last several days, making it economical for repeated use:
Short-Term Storage
For use within 3-5 days:
- Store each color in separate airtight containers
- Keep containers in the refrigerator to prevent bacterial growth
- Cover the surface of the paint with plastic wrap to prevent a skin from forming
- Label containers with color names and dates prepared
Extending Shelf Life
To maximize the lifespan of your homemade finger paint:
- Add a small amount (1/8 teaspoon) of salt to each container as a natural preservative
- Ensure containers are completely airtight
- Use clean utensils when handling stored paint to prevent contamination
- Discard if you notice any off-odors, mold, or changes in texture
Signs Paint Has Spoiled
- Sour or unpleasant odor
- Visible mold or unusual spots
- Separation that cannot be remedied by stirring
- Thick, rubbery texture or complete hardening
Creative Extensions and Variations
Once you’ve mastered the basic recipe, you can experiment with variations to enhance the artistic experience:
Texture Variations
- Smooth: Strain the cooked mixture through a fine mesh for ultra-smooth paint
- Textured: Add a small amount of fine sand or cornmeal for tactile interest
- Thick: Cook the mixture slightly longer for a more substantial consistency
- Thin: Add a small amount of additional water for easier spreading
Scented Options
Adding natural scents can enhance the sensory experience:
- Vanilla: Add a few drops of vanilla extract to the cooled base
- Citrus: Add a few drops of citrus essential oil (ensure it’s food-grade)
- Mint: Add a small amount of peppermint extract
- Cinnamon: Mix in a small amount of ground cinnamon for a warm spice scent
Age-Appropriate Activities
Different age groups can benefit from finger painting in various ways:
Toddlers (Ages 1-3)
- Focus on sensory exploration rather than representational art
- Use primary colors to introduce basic color concepts
- Encourage hand and finger movements to develop motor skills
- Keep sessions short (10-15 minutes) to match attention spans
Preschoolers (Ages 3-5)
- Introduce color mixing concepts with secondary colors
- Encourage more intentional mark-making and pattern creation
- Try simple projects like handprint art or seasonal themes
- Begin discussing what they’ve created to develop language skills
Early Elementary (Ages 5-8)
- Explore more complex color mixing and blending techniques
- Try representational projects like animals, family portraits, or landscapes
- Introduce concepts like foreground/background and spatial relationships
- Encourage storytelling through their artwork
Cleanup and Care
Proper cleanup ensures that finger painting remains an enjoyable activity rather than a dreaded chore:
During the Activity
- Keep damp cloths or wet wipes handy for immediate cleanup of spills
- Encourage children to keep paint on the paper rather than on themselves when possible
- Have a designated area for cleaning hands before touching other surfaces
Post-Activity Cleanup
- Rinse hands and arms thoroughly with soap and warm water
- Use a gentle scrub brush for any stubborn paint residue
- Wash painted clothing separately in warm water
- Clean work surfaces with warm, soapy water
- Store or dispose of used materials properly
Removing Stains
- Act quickly – fresh paint is easier to remove than dried paint
- For dried paint, soak the area in warm, soapy water before scrubbing
- Most homemade finger paint will wash out of most fabrics with regular laundering
- For stubborn stains, try a paste of baking soda and water before washing
Educational Benefits
Beyond the obvious creative outlet, finger painting offers numerous developmental advantages:
Cognitive Development
- Color recognition and mixing concepts
- Cause and effect understanding (pressing harder creates darker marks)
- Problem-solving as children figure out how to achieve desired effects
- Memory development through repeating techniques and patterns
Physical Development
- Fine motor skill enhancement through precise finger movements
- Hand-eye coordination as children aim for specific areas on their paper
- Sensory integration through touch and texture exploration
- Bilateral coordination when using both hands together
Emotional and Social Development
- Self-expression and emotional release through creative activity
- Confidence building as children see their creations come to life
- Social skills development when working alongside peers or family members
- Patience and focus during the creative process
Safety Considerations
While homemade finger paint is much safer than commercial alternatives, certain precautions should still be observed:
Economic and Environmental Benefits
Making your own finger paint offers advantages beyond safety considerations:
Cost Savings
Comparing homemade to commercial finger paints:
- A batch of homemade finger paint using the recipe above costs less than $2
- Commercial finger paint sets typically cost $8-15 for similar quantities
- Ingredients can be purchased in bulk for even greater savings
- Over a year of regular art activities, this represents savings of $50-100
Environmental Impact
- Eliminates plastic packaging from commercial paint containers
- Uses reusable storage containers rather than single-use packaging
- Reduces transportation emissions associated with purchasing commercial products
- Minimizes waste through use of common household ingredients
Conclusion: Embracing Messy Creativity
Homemade finger paint represents more than just a cost-effective alternative to commercial art supplies – it embodies a philosophy of hands-on learning and creative freedom that’s essential for child development. By creating safe, accessible art materials at home, we remove barriers that might prevent children from fully engaging in creative expression.
The process of making finger paint together can be an educational experience in itself, teaching children about measurements, mixing, and cause-and-effect relationships. When they understand that the colorful, squishy substance they’re using was made from simple ingredients in their own kitchen, they develop a sense of empowerment and curiosity about how everyday materials can be transformed.
Perhaps most importantly, homemade finger paint allows parents and educators to feel confident that children are engaging in safe, beneficial play. There’s no need to worry about harmful chemicals or to constantly redirect children away from putting materials in their mouths. This peace of mind enables everyone to focus on the joy and learning that comes from creative exploration.
As you embark on your finger painting adventures, remember that the goal isn’t to create masterpieces – it’s to foster creativity, confidence, and joy in young artists. Embrace the mess, celebrate the process, and treasure the unique creations that emerge from little hands and big imaginations. With homemade finger paint, you’re not just providing art supplies; you’re creating opportunities for growth, expression, and connection that will benefit children throughout their lives.
So gather your simple ingredients, roll up your sleeves, and prepare for one of the most rewarding and memorable experiences you can share with the children in your life. The smiles, laughter, and proud declarations of “Look what I made!” will remind you why sometimes the simplest solutions are the most powerful.