Art is a fundamental form of human expression that transcends age, culture, and skill level. However, the cost of quality art supplies can be prohibitive, especially for families, educators, or beginners exploring their creative potential. Commercial watercolor paints often contain synthetic pigments and binders that, while effective, may not be ideal for young children or those with sensitivities to chemicals.
Enter the wonderful world of homemade watercolor paints – a safe, affordable, and surprisingly vibrant alternative that transforms common kitchen ingredients into professional-quality art supplies. By creating your own watercolors, you not only save money but also gain complete control over the ingredients that come into contact with your skin, workspace, and environment. This DIY approach is particularly valuable for parents, teachers, and anyone who wants to make art accessible without compromising on safety or quality.
The Benefits of Homemade Watercolors
Creating your own watercolor paints offers numerous advantages over commercial alternatives:
Safety First
Commercial paints, especially those marketed for children, may still contain trace amounts of heavy metals or synthetic chemicals. Homemade watercolors eliminate these concerns entirely:
- All ingredients are food-grade and non-toxic
- No synthetic pigments or chemical binders
- Safe for children to handle and even taste (though not recommended)
- No risk of allergic reactions to unknown chemical components
Economic Advantages
The cost savings of homemade watercolors are substantial:
- A single batch can cost less than $5 and yield dozens of paint colors
- Compare this to commercial sets that can cost $15-50 for similar quantities
- Ingredients have multiple household uses beyond art supplies
- No ongoing replacement costs for individual color refills
Educational Value
Making watercolors is an educational experience in itself:
- Teaches basic chemistry concepts like mixing and binding
- Introduces color theory through hands-on experimentation
- Encourages creativity and problem-solving skills
- Connects art to science in an engaging, practical way
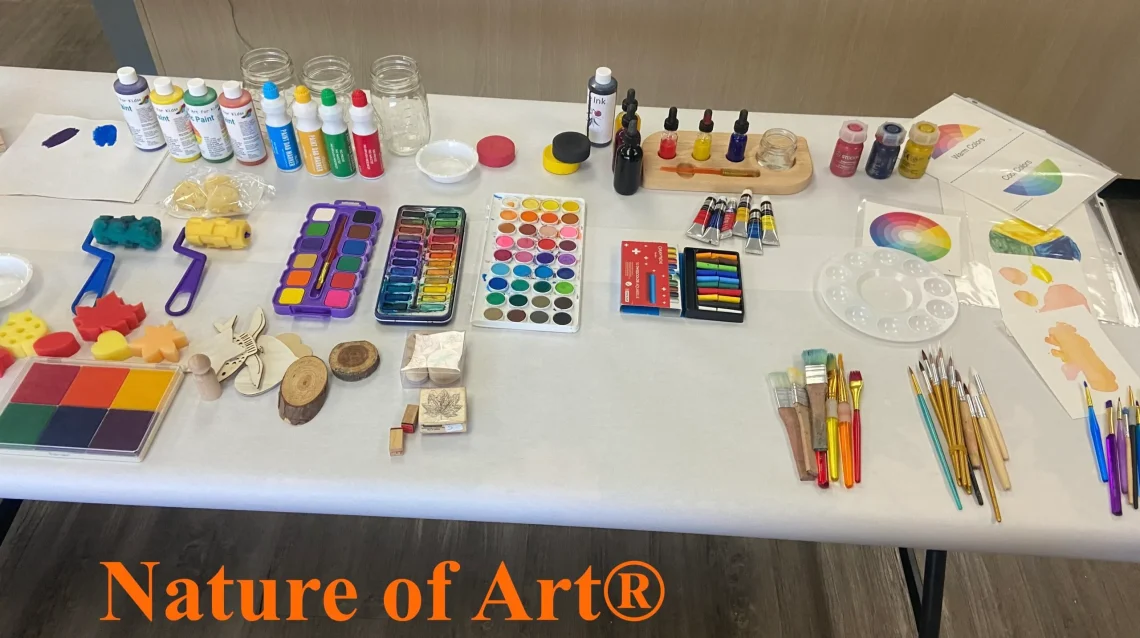
Ingredients & Supplies
Creating professional-quality watercolors requires only a few simple ingredients, most of which you likely already have in your kitchen:
- Baking Soda: Acts as the base pigment carrier and provides the characteristic chalky texture of watercolors
- Cornstarch: Functions as a binder that helps the paint adhere to paper and dry to a smooth finish
- Food Coloring: Provides vibrant, customizable colors (gel or liquid both work)
- Water: The activating agent that makes the paints workable
- Ice Cube Tray: Perfect for creating individual paint portions (silicone trays work best)
- Small Bowls: For mixing colors and creating custom blends
- Measuring Spoons: For accurate ingredient proportions
- Small Whisk or Fork: For mixing ingredients thoroughly
- Paintbrushes: Any basic set will work for initial testing
- Watercolor Paper or Thick Paper: To test and use your homemade paints
The Recipe: Step-by-Step Guide
Follow these detailed instructions to create your own vibrant, non-toxic watercolor paints:
Basic Watercolor Paint Formula
- 2 tablespoons baking soda
- 1 tablespoon cornstarch
- 8-10 drops of food coloring (adjust for desired intensity)
- 1-2 tablespoons water (added gradually)
- Mix Dry Ingredients: In a small bowl, thoroughly combine 2 tablespoons of baking soda with 1 tablespoon of cornstarch. Use a whisk or fork to ensure even distribution and break up any lumps.
- Add Color: Add 8-10 drops of your chosen food coloring to the dry mixture. For more vibrant colors, you can add up to 15 drops, but start conservatively as you can always add more.
- Gradual Moistening: Slowly add water, one teaspoon at a time, while continuously mixing. The key is to add water gradually to achieve the right consistency.
- Test Consistency: The mixture should resemble thick paint – not too dry that it crumbles, but not so wet that it’s runny. You’re aiming for a texture similar to yogurt or thick pudding.
- Adjust as Needed: If the mixture is too thick, add water one drop at a time. If too thin, add a small amount of additional baking soda and cornstarch (maintaining the 2:1 ratio).
Setting in the Ice Cube Tray
- Prepare Tray: Ensure your ice cube tray is clean and dry. Silicone trays work best as they’re flexible and easy to remove paints from.
- Fill Compartments: Spoon the prepared paint mixture into each compartment of the ice cube tray. Fill each about 3/4 full to allow for expansion during drying.
- Smooth Tops: Use the back of a spoon to smooth the tops of each paint portion for a uniform appearance.
- Drying Time: Allow the paints to air dry completely, which typically takes 24-48 hours depending on humidity. The paints are ready when they feel completely dry to the touch and have a matte finish.
- Storage: Once dry, the paints can be stored indefinitely in the tray or popped out and stored in airtight containers.
Creating Custom Colors
One of the most exciting aspects of homemade watercolors is the ability to create custom colors and experiment with color theory:
Color Mixing Guide
- Orange: Mix 2 parts red with 1 part yellow
- Green: Mix 2 parts blue with 1 part yellow
- Purple: Mix equal parts red and blue
- Brown: Mix all three primary colors in varying proportions
- Pastels: Use less food coloring and add a small amount of white food coloring or titanium white pigment if available
- Earth Tones: Mix brown with small amounts of other colors for muted, natural hues
- Metallic Effects: Add a tiny amount of edible gold or silver dust for shimmer (ensure it’s art-safe)
Color Intensity Tips
- Gel food coloring typically provides more vibrant colors than liquid varieties
- Start with less colorant and gradually add more until you achieve the desired intensity
- Colors will appear more muted when dry but will reactivate brightly when wet
- Label your colors as you create them to easily replicate favorites
Getting Creative: Project Ideas
With your new homemade watercolors, you’re ready to embark on countless creative adventures. Here are some project ideas to get you started:
Beginner Projects
- Color Wheel Creation: Make a traditional color wheel to understand color relationships and mixing
- Nature Studies: Paint simple flowers, leaves, or stones found in your garden
- Abstract Expressions: Experiment with color blending and wash techniques on wet paper
- Seasonal Cards: Create handmade greeting cards for friends and family
Intermediate Challenges
- Landscape Sketches: Paint simple scenes from your neighborhood or imagination
- Portrait Studies: Practice painting simple portraits using basic shapes and color blocks
- Pattern Design: Create repeating patterns using your custom color combinations
- Mini Series: Paint a series of small canvases or paper squares depicting a theme
Advanced Techniques
- Wet-on-Wet Painting: Pre-wet your paper and apply paint to create soft, flowing effects
- Layering: Allow layers to dry completely before applying new colors for depth
- Masking: Use masking fluid or tape to preserve white areas in your compositions
- Texture Creation: Experiment with salt, plastic wrap, or sponges to create interesting textures
Using Your Homemade Watercolors
To get the most from your DIY watercolors, understanding proper usage techniques is essential:
Activating Dry Paints
When you’re ready to use your dried watercolors:
- Remove a paint portion from the tray or container
- Place it on a palette or the lid of a small container
- Add water to your brush, not directly to the paint
- Gently wet the brush and touch it to the paint
- Gradually build up color intensity by adding more paint to your brush
Paper Considerations
While your homemade paints will work on various papers, some perform better than others:
- Watercolor Paper: Provides the best results with proper absorption and minimal warping
- Thick Cardstock: A budget-friendly alternative that resists warping
- Canvas Boards: For more textured effects, though colors may appear more muted
- Avoid: Thin paper like notebook paper, which will buckle and tear easily
Storage and Preservation
Proper storage ensures your homemade watercolors maintain their quality and vibrancy:
Short-Term Storage
For paints you plan to use within a few weeks:
- Keep in the ice cube tray with a lid if available
- Store in a cool, dry place away from direct sunlight
- If using individual containers, ensure they have tight-fitting lids
Long-Term Preservation
For extended storage of several months or more:
- Remove from trays and store in small, airtight containers
- Add a small packet of silica gel to absorb excess moisture
- Label containers with color names and creation dates
- Store in a refrigerator for maximum longevity (up to 6 months)
Signs of Deterioration
- Mold or unusual spots on the paint surface
- Off-odors that weren’t present when first made
- Separation of ingredients that cannot be remedied by mixing
- Complete hardening that makes reactivation impossible
Troubleshooting Common Issues
Even with careful preparation, you might encounter some challenges:
Paint Consistency Problems
- Too Crumbly: Add a small amount of cornstarch and mix thoroughly
- Too Runny: Add more baking soda gradually while mixing
- Won’t Hold Shape: Ensure adequate drying time and check humidity levels
Color and Performance Issues
- Fading Colors: Store away from light and heat sources
- Poor Adhesion: Ensure paper is clean and free from oils or lotions
- Muddy Mixes: Clean your brush thoroughly between color changes
Advanced Variations and Enhancements
Once you’ve mastered the basic recipe, consider these enhancements for professional results:
Texture Additives
- Fine Sand: Add a pinch for subtle texture (ensure it’s clean and fine)
- Cornmeal: Provides a more pronounced gritty texture for special effects
- Glitter: Food-safe glitter can add sparkle to special projects
Binding Agent Alternatives
For different paint characteristics:
- Glycerin: A few drops can help maintain moisture and extend working time
- Honey: Natural humectant that can improve flow and adhesion
- White Glue: Small amounts can create more permanent, less reactivatable paints
Educational Applications
Homemade watercolors are particularly valuable in educational settings:
Classroom Use
- Safe for group projects with children of all ages
- Cost-effective for schools with limited art budgets
- Provides hands-on learning about chemistry and art simultaneously
- Allows for customization to match specific curriculum themes
Home Schooling Benefits
- Integrates art, science, and math in a single activity
- Teaches measurement and following instructions
- Encourages experimentation and hypothesis testing
- Creates lasting supplies for ongoing projects
Environmental and Economic Impact
Beyond personal benefits, homemade watercolors contribute positively to broader environmental and economic goals:
Reduced Waste
- Eliminates plastic packaging from commercial paint tubes and pans
- Uses reusable containers like ice cube trays and small jars
- Repurposes common household items that might otherwise be discarded
Cost Analysis
Comparing homemade to commercial watercolors:
- A basic set of 12 commercial watercolors costs $15-30
- Homemade equivalent costs less than $5 for the same quantity
- Ingredients can create 50+ individual color portions
- Over a year, this represents savings of $100-200 for active art families
Conclusion: The Joy of Creating Your Own Art Supplies
Making your own watercolor paints is more than just a cost-saving measure or safety precaution – it’s a gateway to deeper artistic engagement and understanding. When you create your own paints, you become intimately familiar with their properties, limitations, and potential. This knowledge translates into more confident, intentional art-making and a greater appreciation for the materials you’re working with.
The process of making watercolors also reconnects us with the fundamental principles of art and science that have been practiced for centuries. Before commercial production, artists mixed their own pigments and binders, developing deep relationships with their materials and techniques. By following this tradition, even in a simplified modern form, you participate in a rich artistic heritage while adapting it to contemporary needs for safety and accessibility.
Perhaps most importantly, homemade watercolors democratize art-making. They remove financial barriers that might prevent someone from exploring their creative potential. They provide peace of mind for parents who want their children to engage in artistic activities without worry about toxic materials. They offer educators practical solutions for providing quality art experiences within budget constraints.
As you experiment with your homemade watercolors, remember that perfection isn’t the goal – creativity and enjoyment are. Your first attempts may not match the consistency of commercial paints, but they’ll possess something store-bought options can’t offer: the satisfaction of having created your art supplies from scratch and the joy of unlimited color possibilities at your fingertips.
So gather your simple ingredients, embrace the experimental nature of this process, and discover the unique qualities of your homemade watercolors. Whether you’re a parent introducing a child to art, an educator seeking affordable supplies, or an artist looking for a new creative challenge, homemade watercolors offer a rewarding, safe, and surprisingly professional-quality alternative to commercial options. The only limit is your imagination.